Effective app promo videos on an independent developer budget
An entire ecosystem of companies dedicated to creating promo videos has emerged. Their fees range anywhere from a few hundred dollars for an on-screen demo with narration to five figures for professional camera work/lighting/the whole nine yards. For some apps a higher production value can be essential, either because it needs to make a big splash to get its day-one sales or because the audience expects that level of production.
I feel there is a very viable, but often dismissed, option for most indy devs with smaller budgets: the self-made video. When I talk to other developers who don’t have videos it’s usually because the process doesn’t feel very approachable. Building an app is one thing, but shooting a video? Lets not get crazy here.
Slopes really needed a promo video (its audience really loves videos, with gadgets like GoPro mounted to a lot of enthusiasts' helmets) so I had an important question to ask: would the increase in production value by using and outside production company for a promo video yield a larger return on new user revenue vs one I created myself? Ultimately I felt I’d be better served by creating a video in-house, or at least trying.
Let’s run through how I was able to craft a great-looking promo video for Slopes on an indy-dev budget.
Planning - Appealing to Your Audience
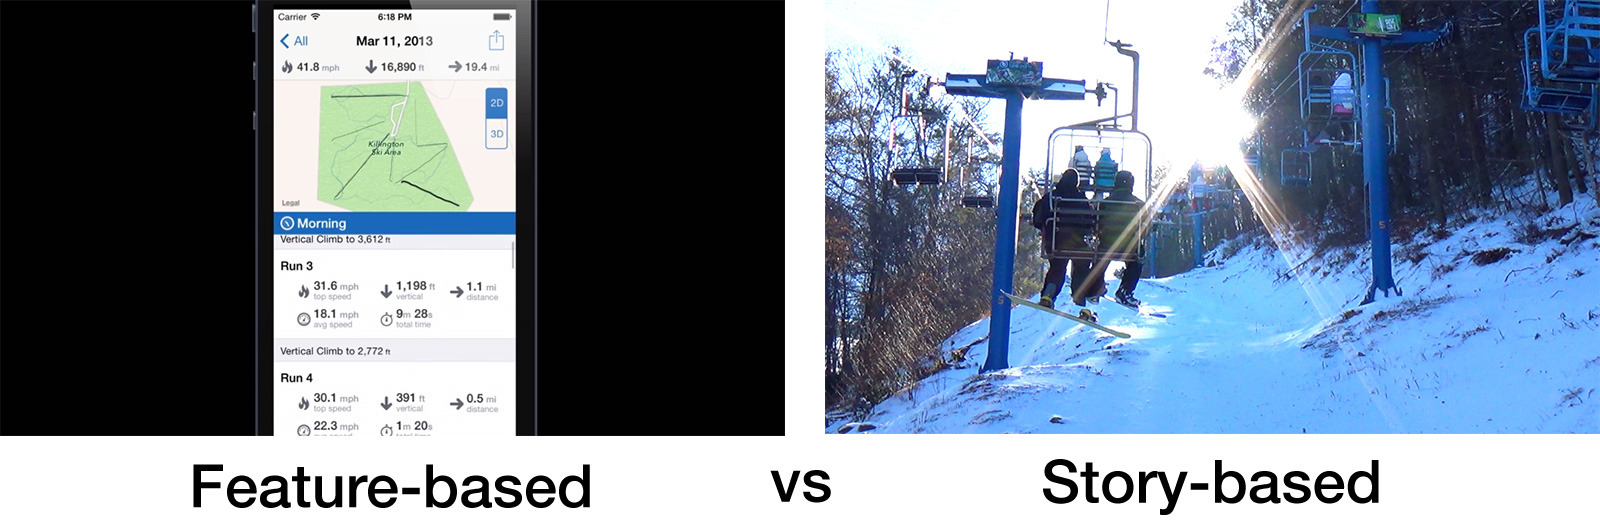
There are two main approaches I’ve seen when it comes to app promo videos: stories vs feature demos.
Story-based videos work great when you want to convince users they have a problem you can solve, and is generally more of an emotional appeal. Jeremy Olson put together an effective story-based video for Grades 3 that entices students by highlighting how Grades can help them manage the stress that comes with school life. They already have enough stress in their lives, they don’t need a feature rundown of a getting-things-done app (yet one more thing to manage!), they need to see how their life will be made easier.
Feature-based videos can work well when your audience already knows they have a problem and are likely shopping around for a solution. Bombing Brain Interactive made a great video for Setlists that helps a performer decide if Setlists is right for them. The format worked well for them because potential users are actively looking for an app to fit their needs, and they want to see how Setlits helps them. The video for Finish from Ryan Orbuch is another great example of an effective feature-based video. Someone seeking out an app like Finish likely already has their problem in mind (a way to manage their todos/reminders) and is looking for a solution that meets their needs. A simple video showing how easy Finish is makes for a very effective promo for that audience.
What kind or promo you need to make all comes down to knowing your audience and how you can best appeal to them. Do your homework, get to know to your users (something I hope you’re already doing).
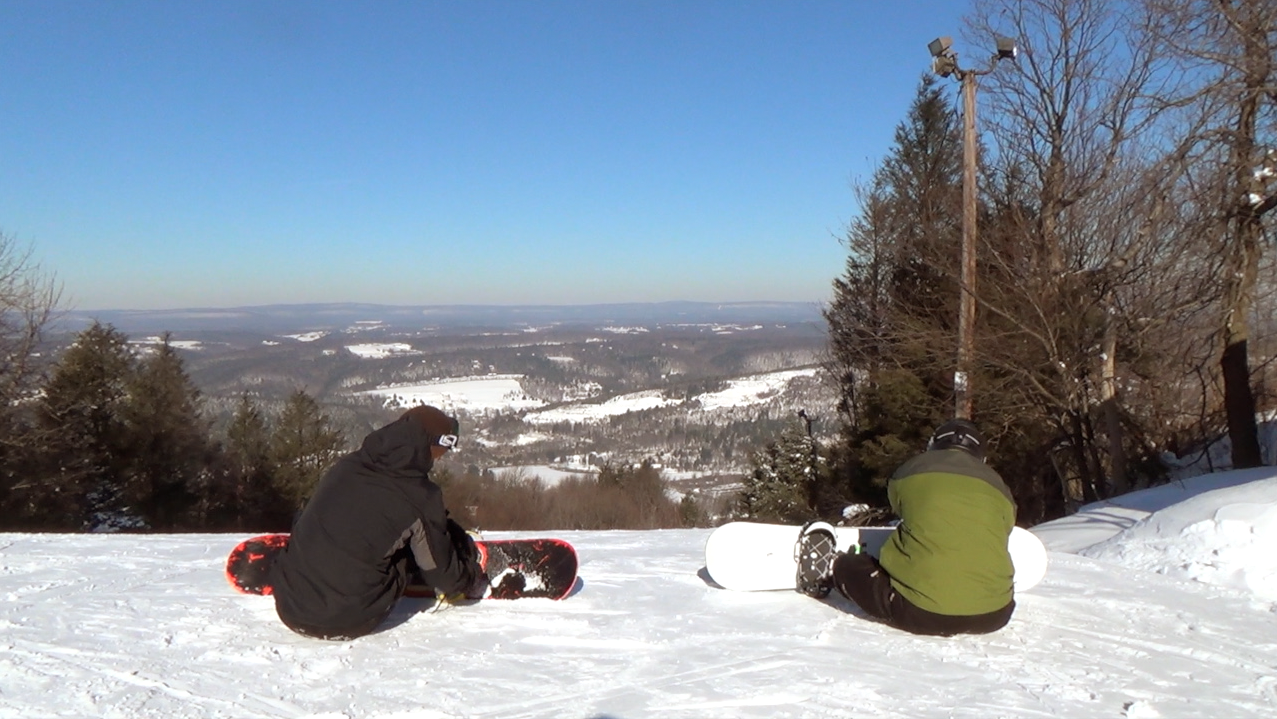
For Slopes most skiers and snowboarders don’t view GPS recording as an existing problem they’re looking to solve, heck most I talk to don’t even realize an app like this might/could exist. That meant the goal of my promo video was to introduce them to the concept and show how Slopes could enhance a sport they are passionate about. That really meant a story to tap into the passion for winter sports and how Slopes fits into that.
(I’ll share an (in retrospect) embarrassing feature-based demo video I did for Slopes way back in the beta days. I didn’t ever run with it because it was completely off-base for my audience.)
Planning - Storyboarding
Start simple here. Get a text file going and brainstorm how your story might flow. What kind of scenes do you want, how to the appeal to the user? What kinds of situations can best highlight your app? What are the key features you wan the user to know about your app?
Narrow those ideas down into something of a reasonable runtime. My ideal runtime was about a minute - enough time to call out some key features in a story, but I knew any longer and my ability as a storyteller would hit a limit and I’d probably lose my audience’s interest.
If you’re more artistic, now is a good time to sketch out some scenes to get a feel for the flow (real “storyboarding”).
It might be tempting to plan on fancy shots and including acting, but try to fight that urge. You probably won’t be able to pull off a lot of difficult shots or deliver convincingly acted dialog your first time. For example don’t plan on fancy zooming during shots without better equipment (lower-end camera zooming always looks artificial and terrible) - a simple cross-disolve between a wide scene to a close scene will likely work just as well. If in doubt try to have a backup shot you can get incase that awesome one doesn’t work out.
I really need to repeat that: keep it simple. Assume every shot is going to be hard to get and figure out how to communicate what you want in the simplest way possible. You’re an amateur, embrace that constraint. Increase your shot complexity after you’ve got a little of this under your belt.
Feel free to take a look at my near-final storyboard.
Ultimately I decided that the story for my video would focus on the audience’s day on the mountain and how the app would be able to show them some really cool info when they were done. I’d need lots of generic action shots of me and my friend snowboarding (which would align well with the normal user-generated GoPro videos my audience loves to create), and a handful of planned story shots to weave throughout the video.
(Decades of videography concepts go into crafting a compelling video, be it commercials or movies. It helps to read up on the basics. I found this article on the cinematography of the Incredibles very helpful in establishing how I wanted my shots to feel.)
Shooting the Video
Obviously you’re going to need equipment. Borrow a camcorder, a DSLR with video, use an iPhone 5s if you’ll have strong lighting, or rent a camcorder for the weekend from one of the many camera rental services. Even the lower-end camcorders are are pretty good for simpler shots and can record in 1080p. Are you filming things indoor? Rent some lighting (Ryan spent ~$60 on lighting for his video, and that was his only cost!), it will make all the difference in the world. Get a tripod, your hands shake more than you realize.
Before you start to shoot, make a shot list (here was mine) with some simple notes. This is essential, especially if you have to travel or are enlisting the help of others, as the opportunity for reshoots might be limited.
Keep your shot list reasonable. You have to realize that a single take, while conceptually quick, might take a lot longer than you expect. Finding a good location, setting up, and getting the lighting right really eats up time.
It’s worth mentioning to always get a few takes of key shots as extra footage is always good. Having more footage to work with gives you greater freedom in post-productiont to play around and craft a better video.
Assembling the Video
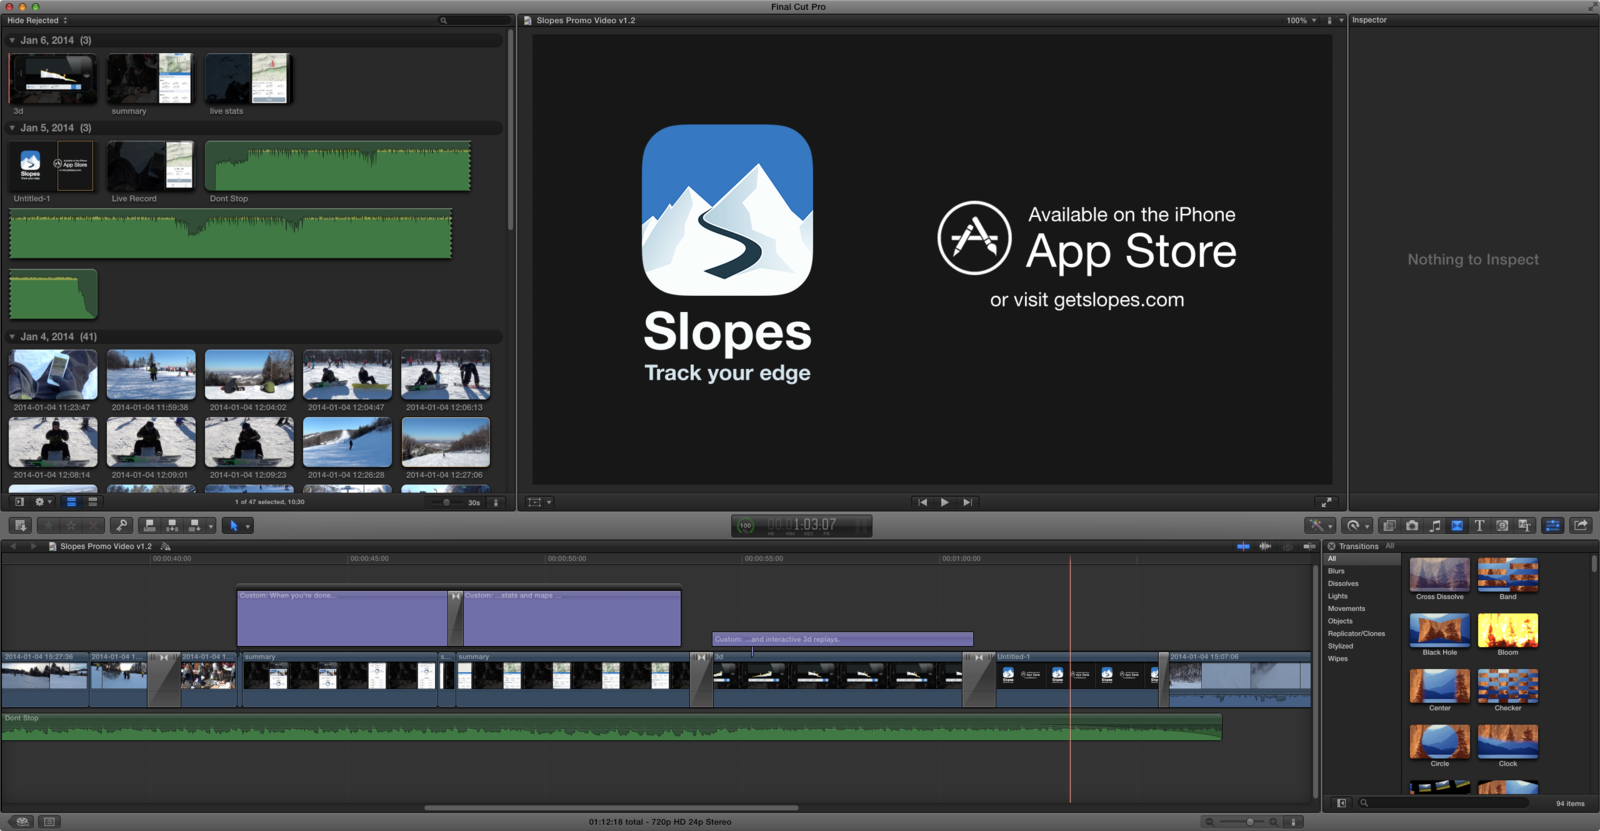
There’s tons of software out there to get this done, and free trials might be a very powerful friend. iMovie is free from Apple and will do a surprisingly great job for a lot of people. You can get a full-featured trial of Final Cut Pro X; that’s route I went for Slopes after starting with iMovie (I wanted better control over color correction and scene tweaks than iMovie offered).
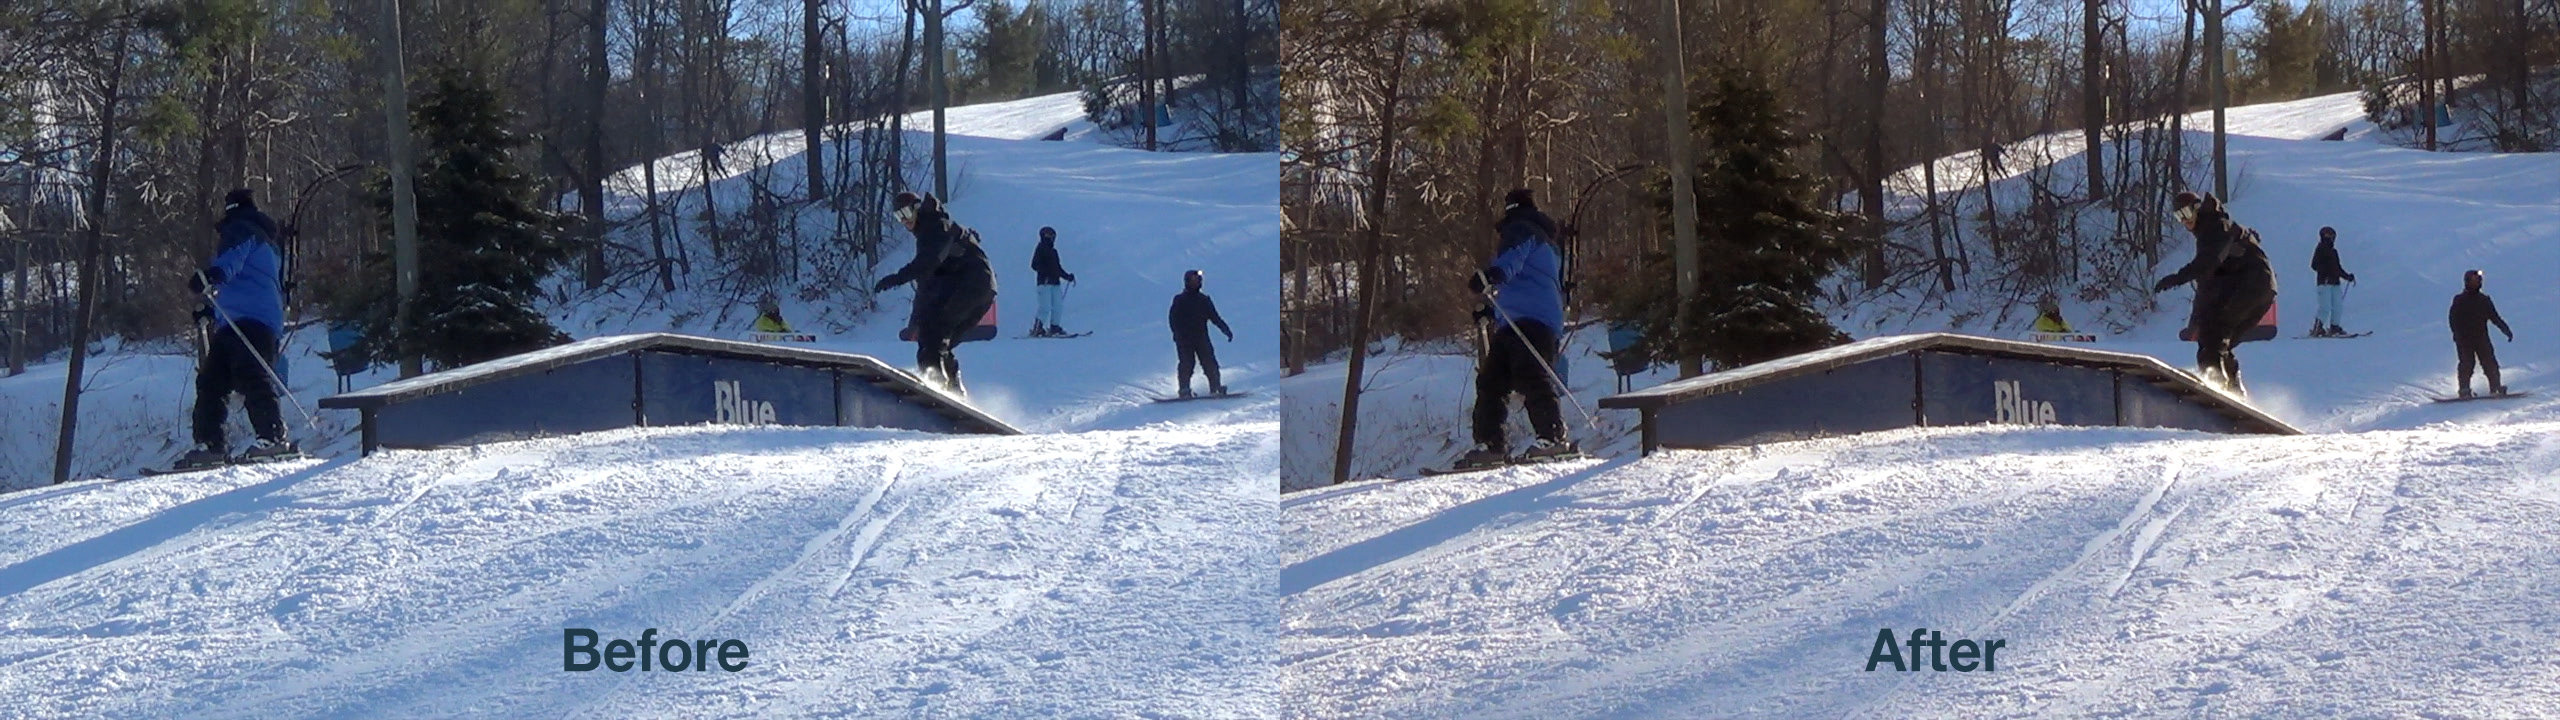
Post-production is where a few simple tweaks can make amateur-looking footage look a lot closer to a professional production. Pay attention to your brightness, exposure, saturation, and color warmth for starters. They can make a huge difference.
If you’re including shots from the iPhone/iPad, instead of just relying on videotaping the device (glare make that tricky), you can use Camtasia 2 to record your iOS simulator and add a device frame around it.
I spent a full day in post production on Slopes' promo video and really some of the best parts of it were the small details I polished as things came together. It’s just like building an app in that regard - play around, see what works best, and pay attention to the little details.
Finished Product
All-in-all I spent about $275 on the promo video for Slopes, and $150 of that was paying for the 3 lift tickets for all of us to be on the mountain for a day. Here’s the final result:
Does it look like a $6,000 promo video? Nope. But it certainly doesn’t look embarrassingly amateur. It’s effective and goes a long way in showing my audience why they’d want my app. Plus I actually had a blast doing it.
I think more developers need to consider making their own promo video as something within their reach. Honestly you’d be surprised what you can create on a budget.