Secondary Views in Interface Builder's Storyboards
I've been all-in on Storyboards in Xcode for some time now. I have very little view and layout code in my controllers, defaulting to Interface Builder and only dropping down into the code when I really can't pull off what I want in IB.
I want to highlight an improvement in Interface Builder in Xcode 7 (WWDC '15) that's made a world of difference for me in Storyboards.
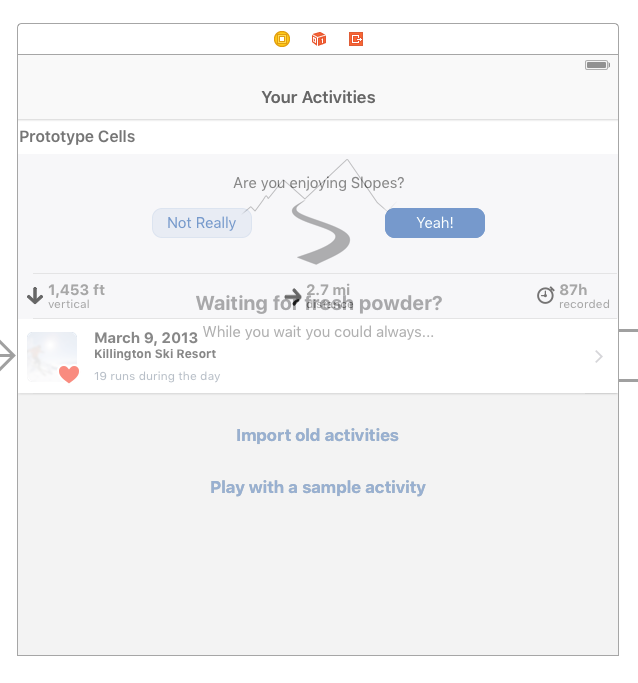
IB's focus is on designing your main view (MyViewController.view) for each scene. But sometimes we have views, I call them secondary views, that we don't want to be part of the normal view hierarchy by default. Maybe it's a tutorial overlay view, or maybe it is a custom banner letting the user know they're running low on Smurfberries. They are views that are specific to a given view controller but only need to be shown in certain conditions. You want to be able to design them in IB instead of code, but where do you keep 'em?
If you embed this secondary view in your main view as a child, and hide / show it in code, it's a pain to design in IB. It gets in the way of your normal view if you leave it on top of the view stack, or you've got to remember to pull it to the front to edit it if you normally keep it behind everything.

Using a separate XIB is certainly valid, and probably the cleanest way to get this kind of thing to work nicely pre Xcode 7. That was my old method of choice but I didn't like having to hop around Storyboard / XIB files as I was updating designs. I didn't like that the secondary views weren't right along side the view controller they belonged to.

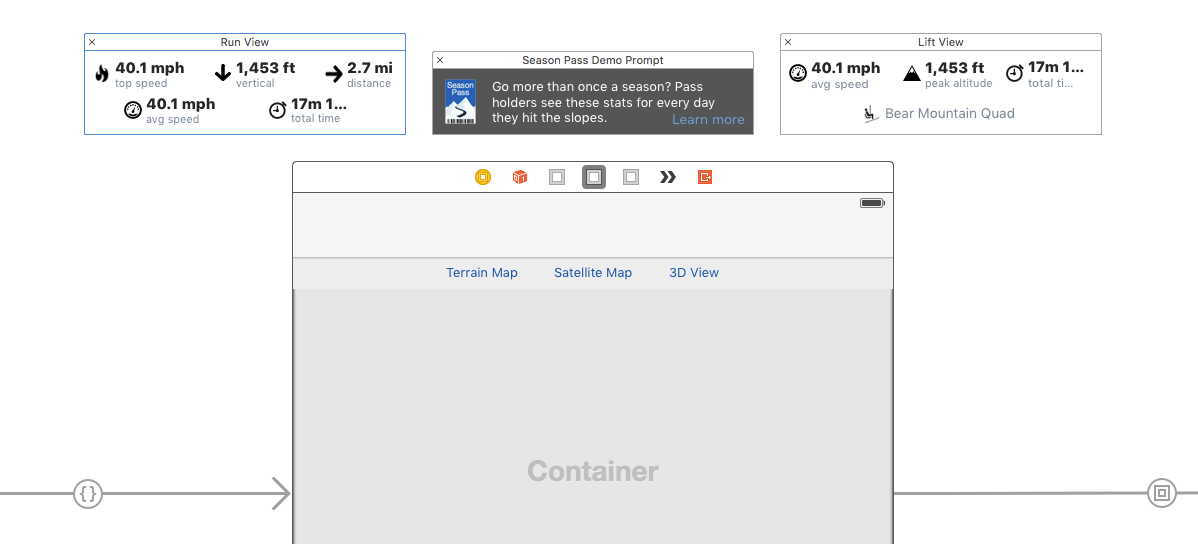
You know that toolbar at the top of every scene? You probably click and drag off of the yellow icon when you're hooking up an IBOutlet / IBAction or need to change a property on the controller (and the adventurous might have even used that orange icon for unwind segues). If you've ever added a gesture recognizer in IB you've seen it appear up there, too.
Did you know can store views in there that aren't part of the main view hierarchy? And in Xcode 7, when you click on those views in the toolbar, they pop open above your scene so you can lay 'em out with all the normal IB goodness.

The views you drop into the toolbar can be hooked up to your view controller via regular IBOutlets (after all, they aren't part of your main view, so you have to reference them somehow). Then you can add / remove it from your main view hierarchy whenever you need to.
So what does this look like in code? The important bits are what you'd likely expect:
@IBOutlet var myAlertView: UIView!

func myAction() {
    //don't want to double-show the view
    guard myAlertView.superView == nil else {
        return
    }
    //add the view as a child to whichever view makes sense
    view.addSubview(myAlertView)
    //hook up any autolayout needed to place the view
    myAlertView.translatesAutoresizingMaskIntoConstraints = false
    //etc etc
}

func myDismissAction() {
    myAlertView.removeFromSuperview()
}
One very important note: I'd recommend your IBOutlet reference to these secondary views be strong instead the weak var we're used to. Why? Well normally your weak IBOutlets stick around because the screen is keeping a hold of the view hierarchy until that scene goes away (at which point your view controller is going away, too, so it all works out), but remember we're possibly removing these views after we show them. If we remove a weak view from the main screen then nothing is left holding onto the view, so the IBOutlet would turn nil and we'd never be able to re-show it (until the entire view controller was re-initialized from the storyboard).
I've been thoroughly enjoying this new IB ability since the summer. It lets me group my smaller views in with the controllers they're used in, and still use all of IB's Auto Layout and design tools. Pretty nice hidden little gem.