Unique icons for debug, beta, and App Store builds in Xcode 5
During development of Slopes I decided to refine my Xcode project setup to gracefully allow for multiple versions of my app to exist on-device at the same time. Dev/staging/production is a familiar concept to most software developers, and really it’s surprising it isn’t a default setup in Xcode.
Simon Wolf posted a great article earlier this year on setting up an XCode project to support multiple builds, while having to maintain only a single target. In his article Simon goes over how to make sure each build generates an app with a unique display name (“Slopes β” for a beta build, for example), all of which can be installed on-device simultaneously.
But I’ve found that the name isn’t enough. I, and my testers, have had a difficult time differentiating between the builds on name alone. I wasn’t the biggest fan with his suggestion where one could use the notification badge as an additional visual indicator. I wanted to customize the icon.
Pre-Xcode 5 using a single target prevented me from customizing the app’s icon per build (without annoying build scripts). Fortunately with the introduction of media assets in Xcode 5 there’s a way now.
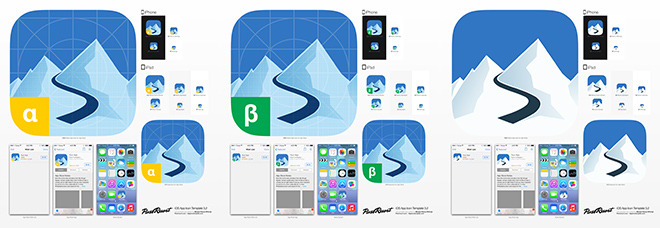
Before you start, spend some time in Photoshop to generate an app icon for each build you want to customize. I created unique icons for my dev and beta builds.

Feel free to reuse the PSD I made for dev and beta badges. It’s based on the icon template from appicontemplate.com.
Multiple icons using media assets
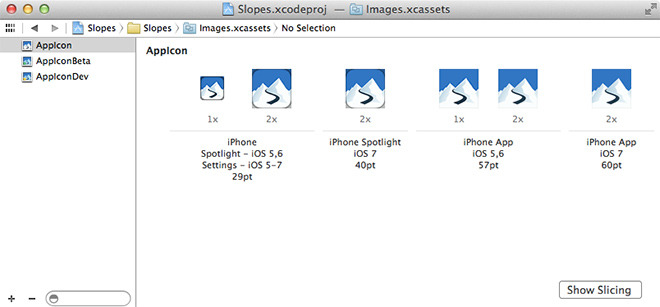
If you’re migrating from an Xcode 4 project and you haven’t migrated your app icons to media assets yet, you need to do so. Apple makes this switch easy: go to your main target’s general info and hit the use media assets button next to your existing app icon. This will copy your existing app icons into a media asset folder in your project. You’ll see one asset in there called AppIcon.
If your project started in Xcode 5, using media assets for your app icon will be the default. You’ll already see an asset called AppIcon in your catalog.
With the your app’s media asset catalog selected from the project navigator on the left go the system menu and select Editor->New App Icon. Rename this new icon set to AppIconDev and drag in your customized app icons for your dev build. Do the same thing for another new app icon you’ll call AppIconBeta.

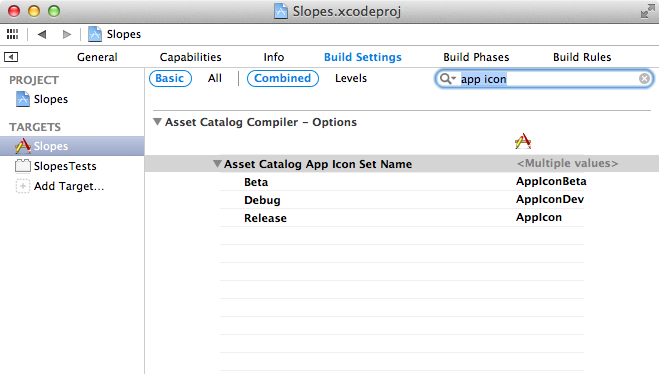
With your icons set up, the last step is to tell Xcode which icon set to use for each build. Head over to the build settings for your target and look for the setting called “Asset Catalog App Icon Set Name” under the Asset Catalog Compiler group.
Right now the icon set name should be set to AppIcon for all your configurations. That’s fine for our App Store build but we need to change the name for the dev and beta builds.
If you followed Simon’s article you can expand that setting to see you can specify the app icon set for three configurations: debug, release, and beta (or “adhoc” in Simon’s setup). If you didn’t follow his article, I’d really recommend you go do that and get unique names and bundle IDs set up for your three builds.
Set the icon set name for debug to AppIconDev and set the name for beta to AppIconBeta. Least the icon set name for release the same.

Bonus Round
Similar to how Simon avoided hard-coding the app name and bundle ID by using two custom build settings, BUNDLE_ID_SUFFIX and BUNDLE_DISPLAY_NAME_SUFFIX, you can avoid hard-coding the app icons names with a third suffix: BUNDLE_ICON_SET_SUFFIX. With that in place you can set the icon set name setting to AppIcon${BUNDLE_ICON_SET_SUFFIX} for all three configurations.